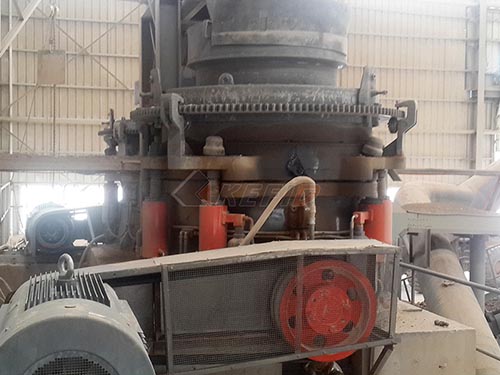
Gold Ore Crushing Equipment Manufacturing Inspection: Ensuring Reliability in a Critical Process
Gold ore crushing is the foundational stage in mineral processing, where run-of-mine (ROM) ore is reduced to a size suitable for further liberation and recovery of gold. The equipment performing this task—jaw crushers, gyratory crushers, cone crushers, and high-pressure grinding rolls (HPGR)—operates under extreme conditions of abrasion, impact, and stress. Consequently, the manufacturing inspection of this equipment is not merely a quality control step; it is a critical risk mitigation strategy that ensures operational continuity, worker safety, and long-term economic viability for mining operations. This article provides a detailed examination of the comprehensive inspection protocols throughout the manufacturing lifecycle of gold ore crushing equipment.
Phase 1: Incoming Material Inspection & Certification
The foundation of reliable equipment lies in the quality of raw materials. Inspection begins before any machining takes place.
- Material Certification & Traceability: All high-strength alloy steel plates, castings (for mantles, concaves, jaw dies), and forgings (for shafts) must arrive with full mill test certificates (MTCs) conforming to specified standards (e.g., ASTM A514 for abrasion-resistant steel). Inspectors verify chemical composition (ensuring adequate levels of carbon, manganese, chromium for hardness and toughness) and mechanical properties (yield strength, tensile strength, Charpy V-notch impact values). Each piece must be traceable via heat numbers back to its original melt.
- Non-Destructive Testing (NDT) on Raw Forms:
- Ultrasonic Testing (UT): Performed on steel plates and large forgings to detect internal flaws like laminations, inclusions, or voids that could become failure initiation points under cyclic loading.
- Dye Penetrant Inspection (DPI) or Magnetic Particle Inspection (MPI): Used on castings upon arrival to reveal surface-breaking defects such as cracks, cold shuts, or porosity in critical components like crusher jaw bodies or cone crusher heads.
Phase 2: In-Process Manufacturing Inspection
This phase monitors the precision of fabrication and machining processes that define the equipment’s geometry and functional integrity.
- Dimensional & Geometrical Control:
- Fabrication (for frames and housings): Inspectors use laser trackers and total stations to verify critical dimensions, flatness of mounting surfaces, squareness of assemblies, and alignment of bearing housings. Misalignment here causes premature bearing failure and vibration.
- Machining: For components like eccentric sleeves, main shafts, and piston housings, coordinate measuring machines (CMMs) are employed to check tolerances often within microns. The concentricity of a main shaft or the precise thread profile on a adjustment ring is vital for smooth operation and controlled setting adjustment.
- Welding Procedure & Personnel Qualification: All welding procedures (WPS) must be qualified per ASME Section IX or equivalent standards. Welder performance qualifications (WPQ) are rigorously maintained. Critical welds—such as those joining wear liners to backing plates or constructing the main frame—are subject to 100% inspection.
- In-Process NDT:
- Radiographic Testing (RT): Used on thick, critical welds in load-bearing structures to provide a volumetric image of internal weld quality, detecting lack of fusion, slag inclusions, or cracking.
- MPI/DPI: Repeated after major machining steps or stress-relief heat treatments to ensure no new surface defects have been introduced.
Phase 3: Pre-Assembly & Surface Treatment Inspection
Before final assembly components undergo treatments that enhance their durability.
- Heat Treatment Verification: Components like gears shafts require specific heat treatments (quenching and tempering) to achieve core toughness with surface hardness. Inspectors review furnace temperature charts and conduct hardness surveys using Brinell or Rockwell testers across multiple points to ensure uniformity.
- Coating & Corrosion Protection: For non-wearing surfaces especially in environments near leaching circuits coatings are critical Inspectors check surface preparation blast cleanliness profile adhesion via cross hatch tests dry film thickness DFT measurements
Phase 4 Final Assembly Factory Acceptance Testing FAT
This is the most integrated validation before shipment
1 Assembly Verification Inspectors oversee the fitting of bearings seals lubrication systems ensuring proper clearances preloads per engineering drawings They verify alignment between motor drive shaft crusher flywheel using dial indicators laser alignment tools
2 Functional Testing FAT While full load testing with ore is impractical manufacturers conduct comprehensive FAT
- Mechanical Run Test The assembled crusher is run uncrushed typically for several hours at various speeds Vibration analysis is performed at all bearing locations with readings compared against ISO standards like ISO10816 Excessive vibration indicates imbalance misalignment or assembly issues
- Hydraulic System Testing For modern cone crushers with hydraulic setting adjustment clamping clearing systems pressure tests function checks leak checks are performed Cycle times for adjustment are measured
- Lubrication System Verification Flow rates pressure filters cooler function are tested ensuring adequate oil reaches all bearings under simulated conditions
- Control System PLC Validation All interlocks alarms monitoring functions pressure temperature are simulated tested ensuring control logic protects machine from unsafe conditions
3 Documentation Review The final inspection includes a complete dossier as built drawings material certifications NDT reports FAT results lubrication manuals assembly procedures This Operational Maintenance Manual OMM package is part deliverable
Phase 5 Special Considerations for Gold Ore Applications
Gold ore crushing presents unique challenges that inspectors must emphasize
- Abrasion Resistance Verification For wear liners manganese steel components inspectors may oversee additional testing like laboratory scale abrasion tests ensure material grade selected meets expected life
- Contamination Prevention In processing routes where gold follows gravity concentration fine metallic iron contamination from worn crushing parts can cause downstream issues smelting Inspectors may verify use specific liner materials minimize this risk
- Hygiene Design For areas requiring clean access maintenance inspectors might evaluate design sharp edges accessibility lifting points safety
Conclusion The Strategic Imperative
Manufacturing inspection for gold ore crushing equipment is a multidisciplinary discipline blending metallurgy mechanical engineering ndt expertise Its goal transcends defect detection It builds predictable performance into machinery that will operate continuously remote locations where unplanned downtime costs can exceed tens thousands dollars per hour A single undetected flaw subsurface inclusion poorly qualified weld can lead catastrophic failure causing weeks production loss severe safety hazards Therefore rigorous transparent inspection protocol shared manufacturer client forms bedrock trust long term partnership Ultimately investment thorough manufacturing inspection represents strategic upfront cost avoidance ensuring primary size reduction circuit remains reliable robust cornerstone entire gold extraction process


